


Hi there, welcome to this week’s issue!
This week I’m going to cover something slightly different - hardware. AI is now making it possible for non-coders like me to start hacking and doing interesting things with custom hardware, all from just prompting!
It’s really fun and there are so many differnt things you can make, your imagination is the only limit.
In this week’s issue I’m going to go through how to get started with your first AI hardware project… building custom dashboards on a tiny wireless eink display. I had so much fun working on this!
Also… I had some other exciting news this week. I joined the OpenAI Codex Ambassador Program which is super exciting! I’m going to be announcing the first Codex Community event for Brighton next week so keep an eye out on X next week for announements.
But back to this week’s issue, let’s talk custom hardware!
If you’re anything like me, you’ve probably seen loads of people sharing interesting builds on X using weird and wonderful hardware form factors.
They’re all mostly powered by the ESP32 chip, an ultra low power chip. It doesn’t have much processing power but it’s perfect for these kinds of fun and cheap devices.
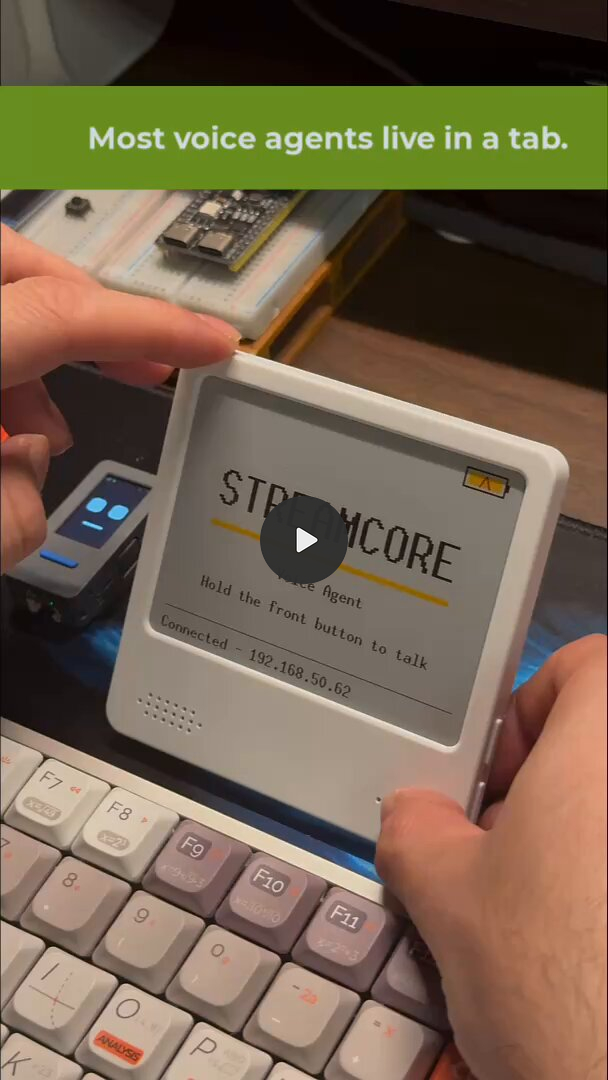
I saw lots of people sharing their interesting projects of hacking on the Zectrix Note 4C developer kit (which uses the ESP32 chip) and it peaked my curiosity, so I decided to order one to have a play with!
Here are a few of my favourite examples…


Macro tracking on your fridge!

The Hardware
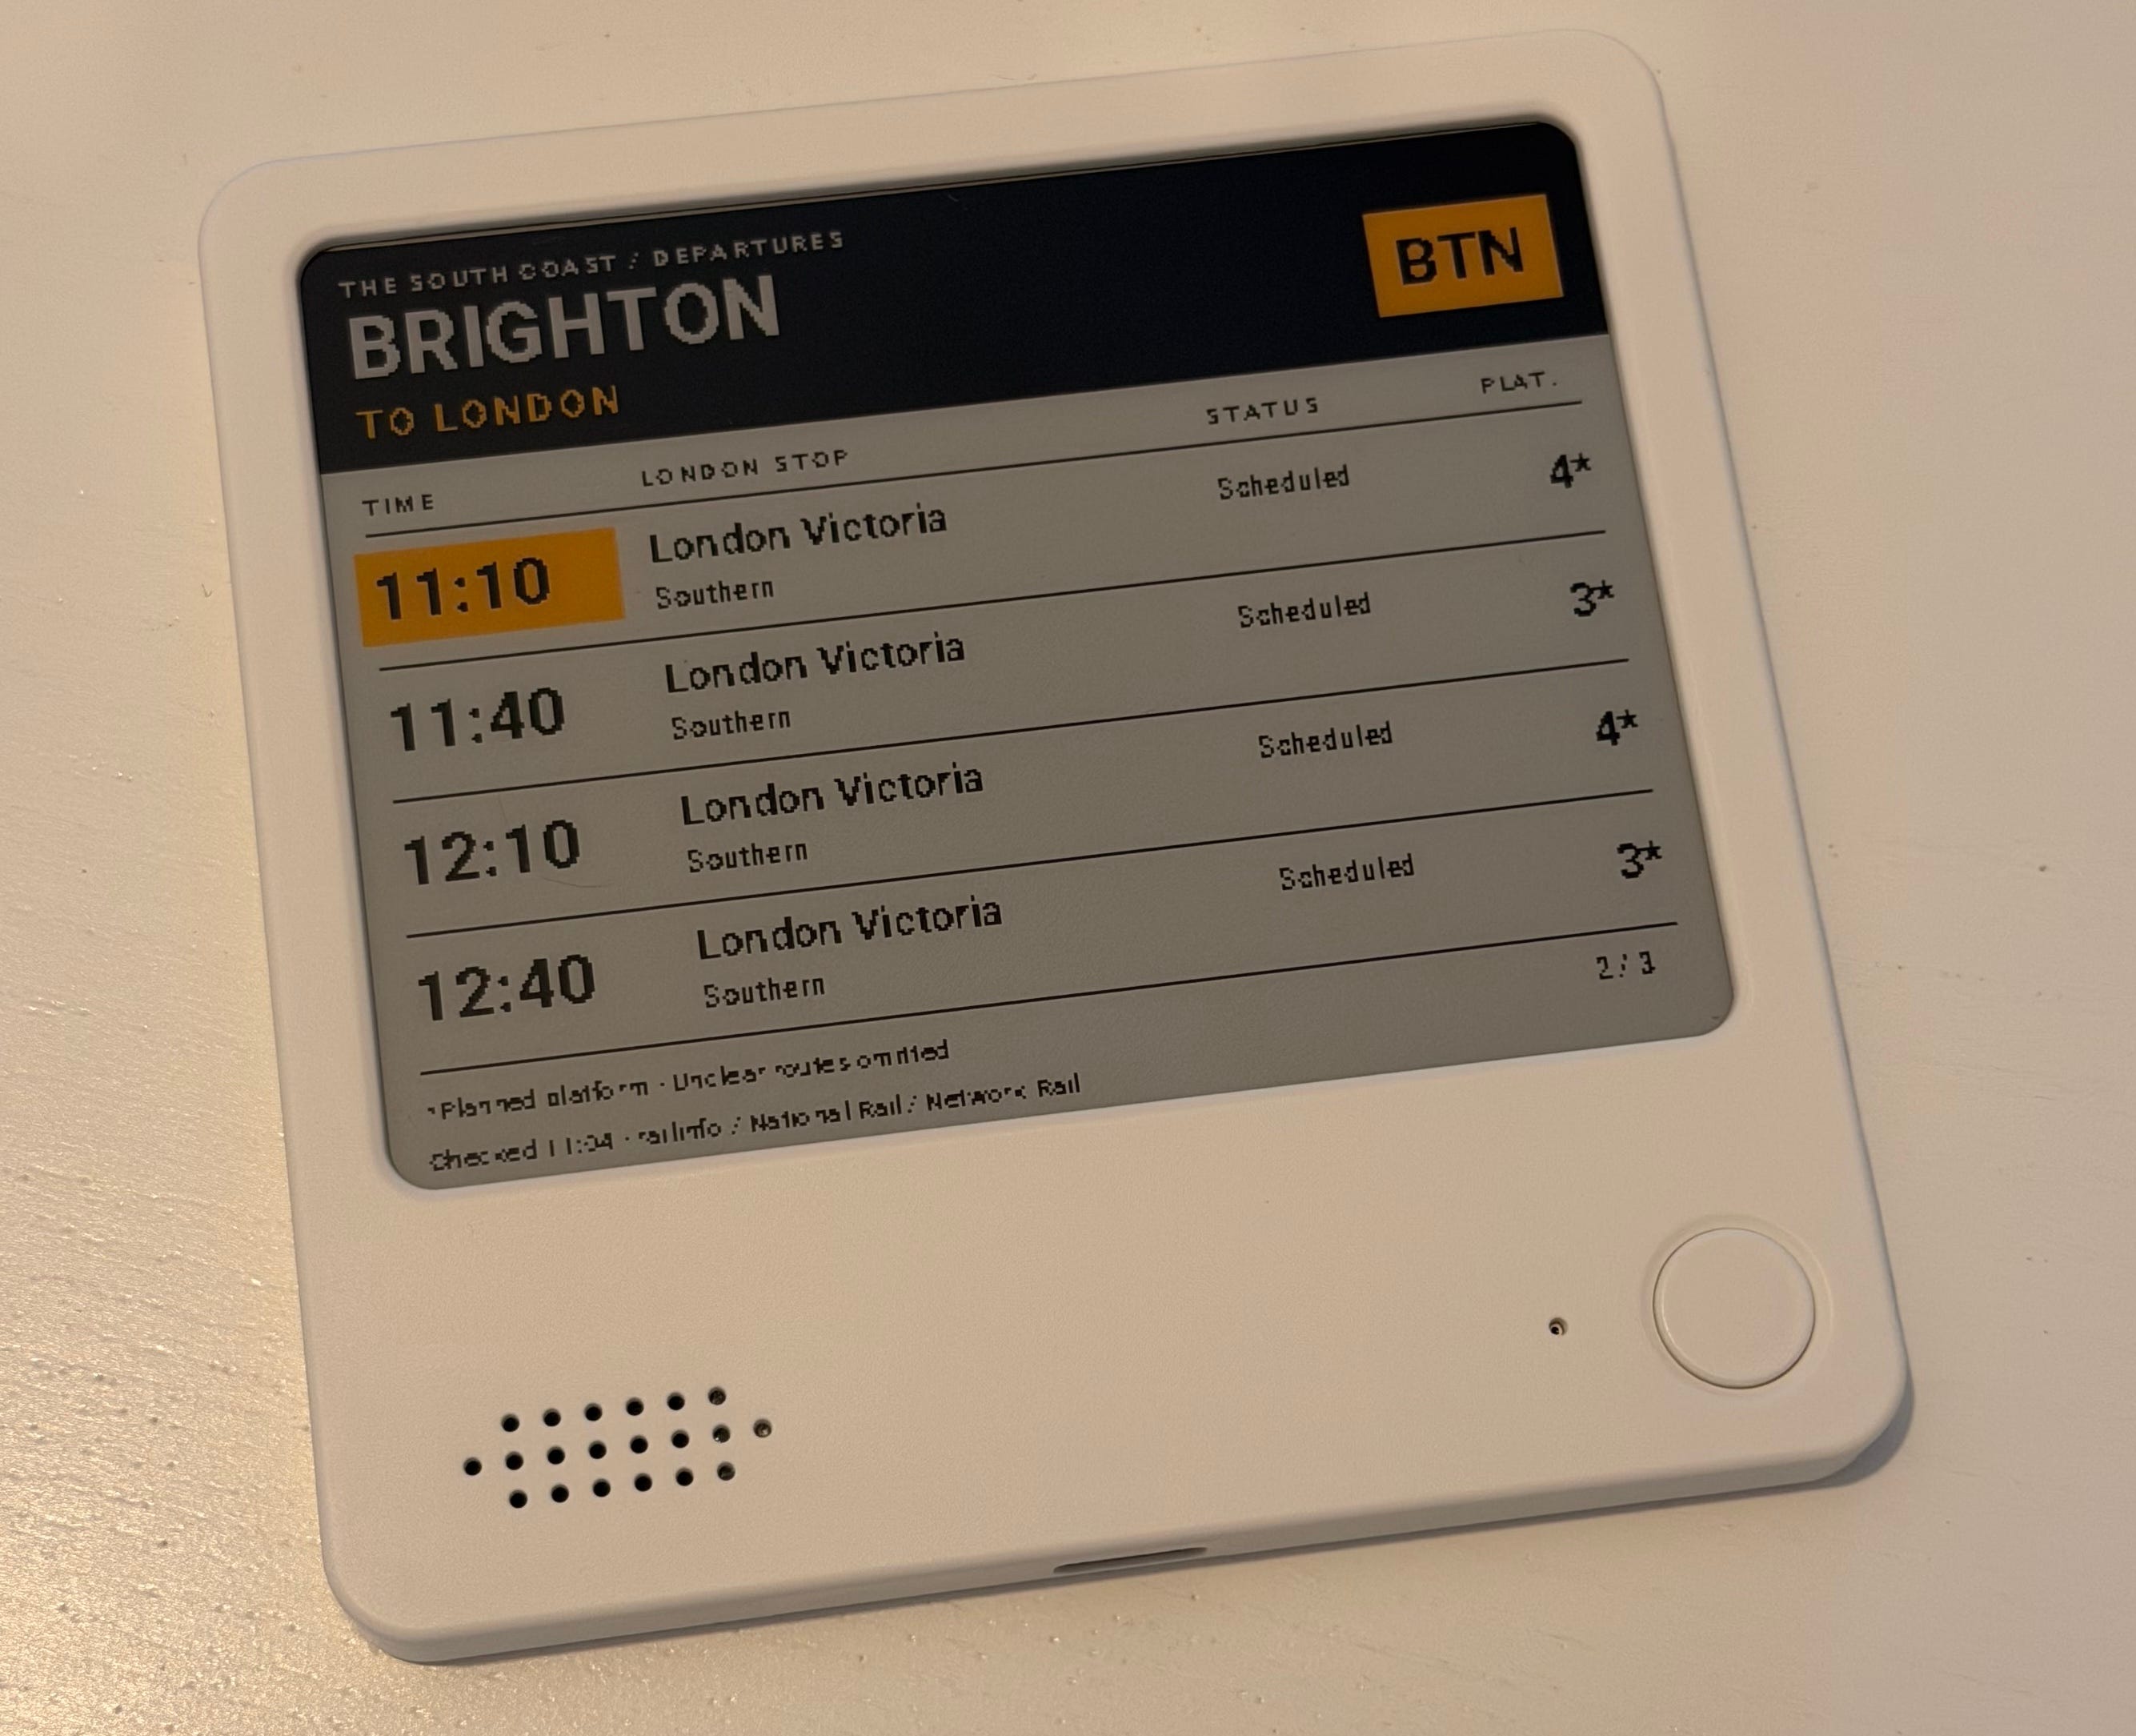
I think this device is a great place to start for hacking on your first AI project, the hardware itself packs a lot into it’s tiny casing.
4 colour eink display
Wifi
Control buttons
Speaker
Mic
Bluetooth
NFC
Magnetic casing - stick it on your fridge!
So it has tons of opportunities for interesting hack projects. I love some of the examples above where people have made voice powered OpenClaw clients they stick on their fridge, custom calendars. Kieran even made an amazing pocket money tracker!
You can get the Note4C for $53 or £43 delivered using the special discount code I got from Zectrix CEO Richard (more on that below)
Mine took about a week to arrive. The unit has a built in battery so the only other thing hardware wise you need to start hacking is a USB C cable.
The Software
You have a few different options when it comes to the software. You can either use the official Trmnl BYOD service to host your screens at £39 for a lifetime license, or you can host it for free on a Cloudflare Worker.
I decided to go down the Cloudflare Worker route as it’s by far my favourite platform to build on… plus it’s free!
If you’re planning to use Cloudflare Workers, I recommend signing up for a free Cloudflare account and then connecting the official Cloudflare plugin to Codex.
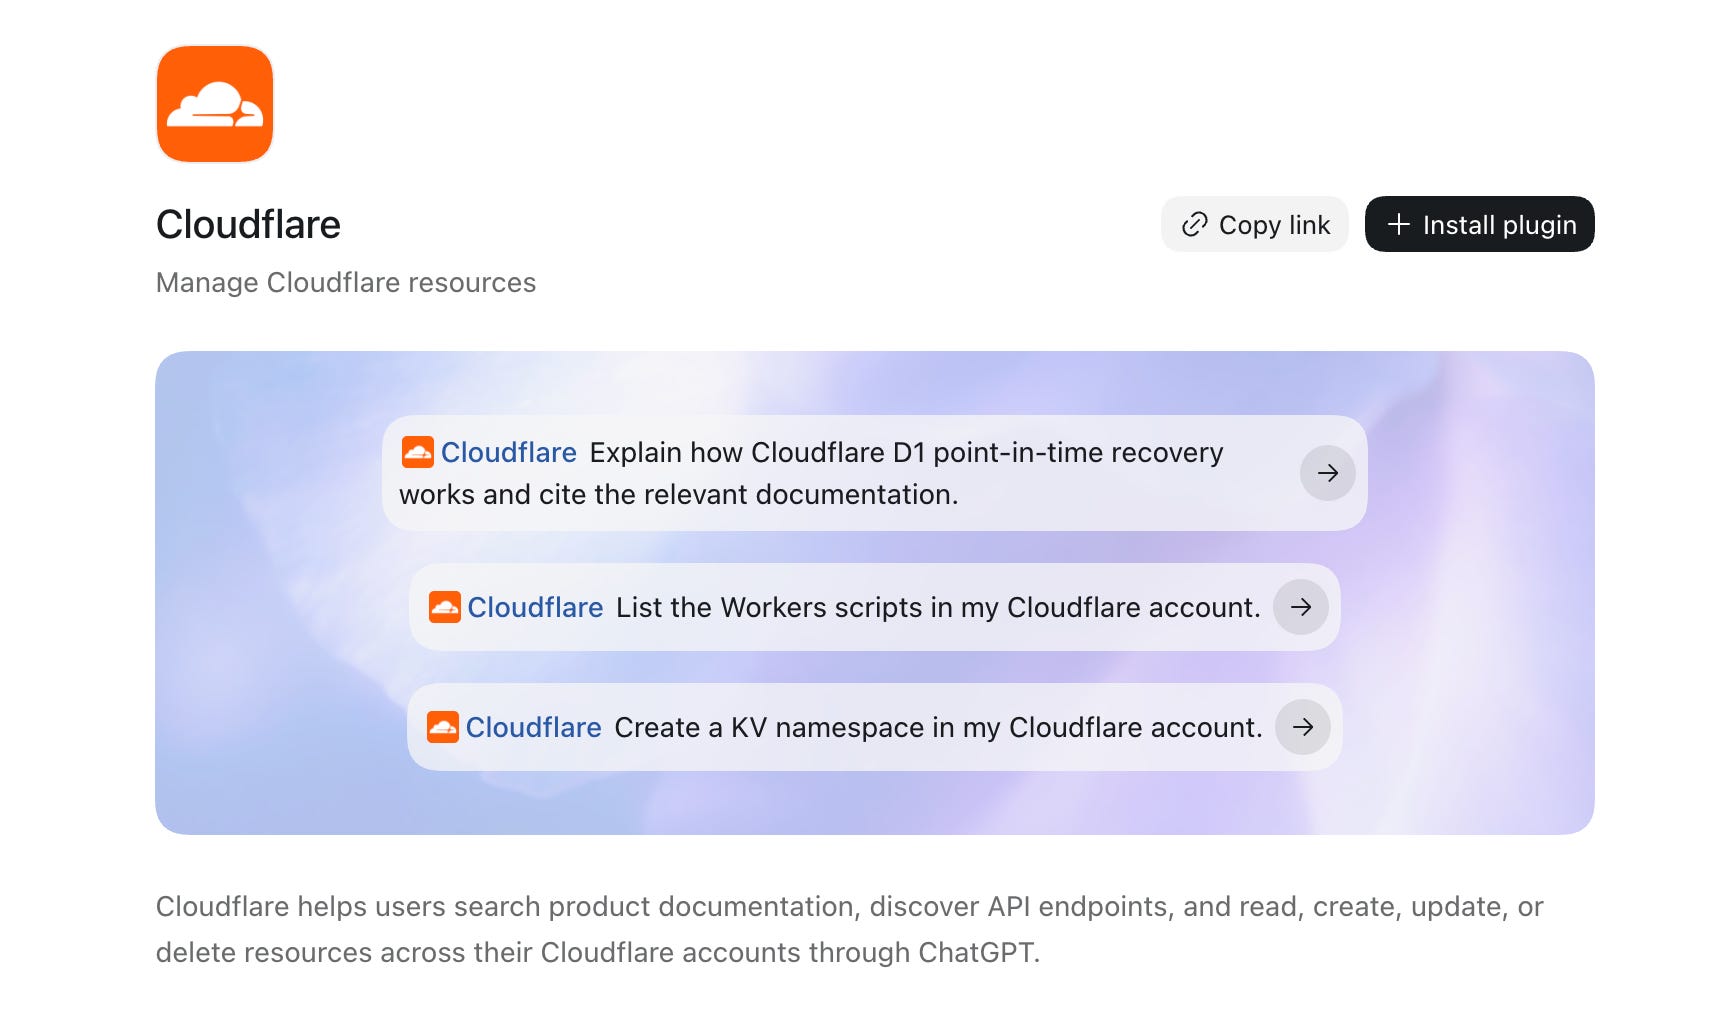
Once you have your Cloudflare account set up, it should be as simple as:
Going into Codex
Selecting Plugins from the left menu
Searching for Cloudflare
Pressing the Install Plugin button (like screenshot above), which will take you back to Cloudflare to authorise everything
This then means that when we come to start building, the software Codex is able to handle deploying it to Cloudflare all for you automatically
If the dashboards that you’re planning to build use any external APIs, it will be the Cloudflare worker that pulls in the data from that API and renders it into the image, ready to be served onto the device itself.
If you need to add anything like API keys, they can be added as variables in the Cloudflare worker. You’ll be able to talk through with Codex how to do that, but it’s a very simple interface, and it keeps all your API keys secure
To get started with a simple API I decided to use the free Railinfo api, you don’t even need an API key to use it.
Building With Codex
For the demo today I’m going to talk through how to build a train departure tracking screen, using live data from the free Railinfo API, rendered to an image on a Cloudflare Worker then displayed on the Zectrix display.
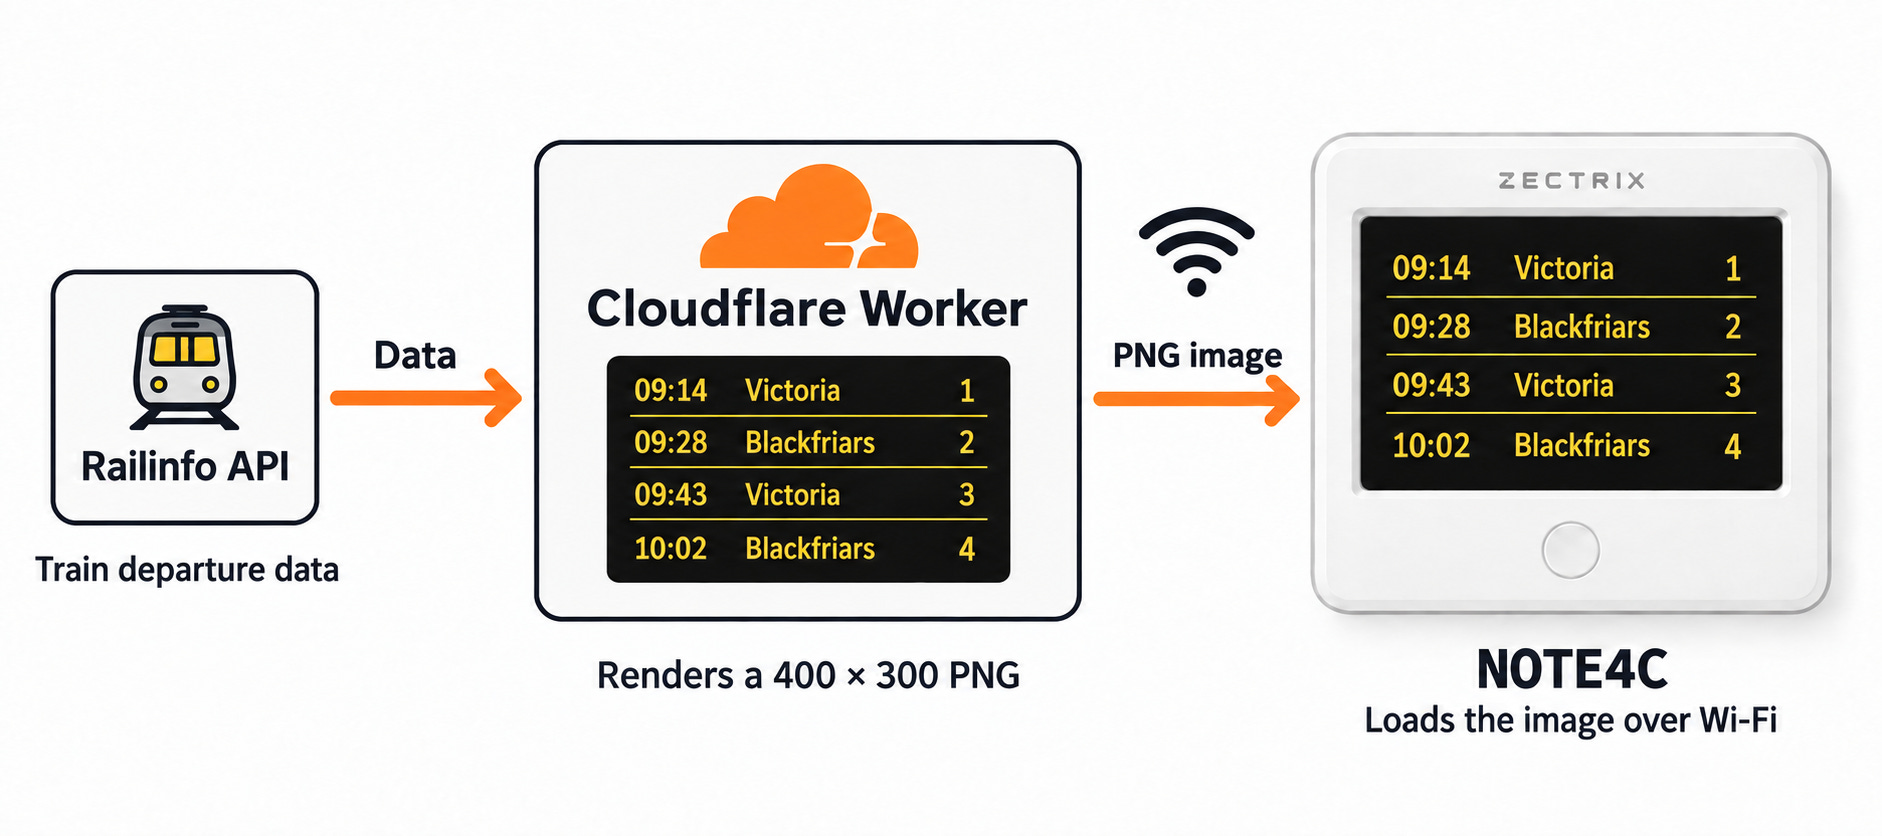
Broadly this is the structure of what we’re making… the Cloudflare Worker is effectively the brain and pulls in the live rail data and turns it into a PNG image which can then be rendered on the hardware devices’s display. The Note4C then pulls this image directly from Cloudflare and shows it on it’s screen.
You’ll be able to customise how frequently the screen updates later on, and add as many other different screens as you like which the device can then cycle through.
Once you have your device ready and plugged in via USB-C to your computer, and your Cloudflare Worker account set up and connected to Codex, we’re ready to start building the service and connecting it to the device.
The first thing I did when I unboxed the Note 4C device and connected it to my MacBook and Codex was to plug it in on USB-C and then ask Codex if it could read and connect to the Note 4C device.
I recommend running Codex in Full Access mode for this task as it needs to communicate with the device over USB, though of course as always be aware of the risks of this and make your own devision.
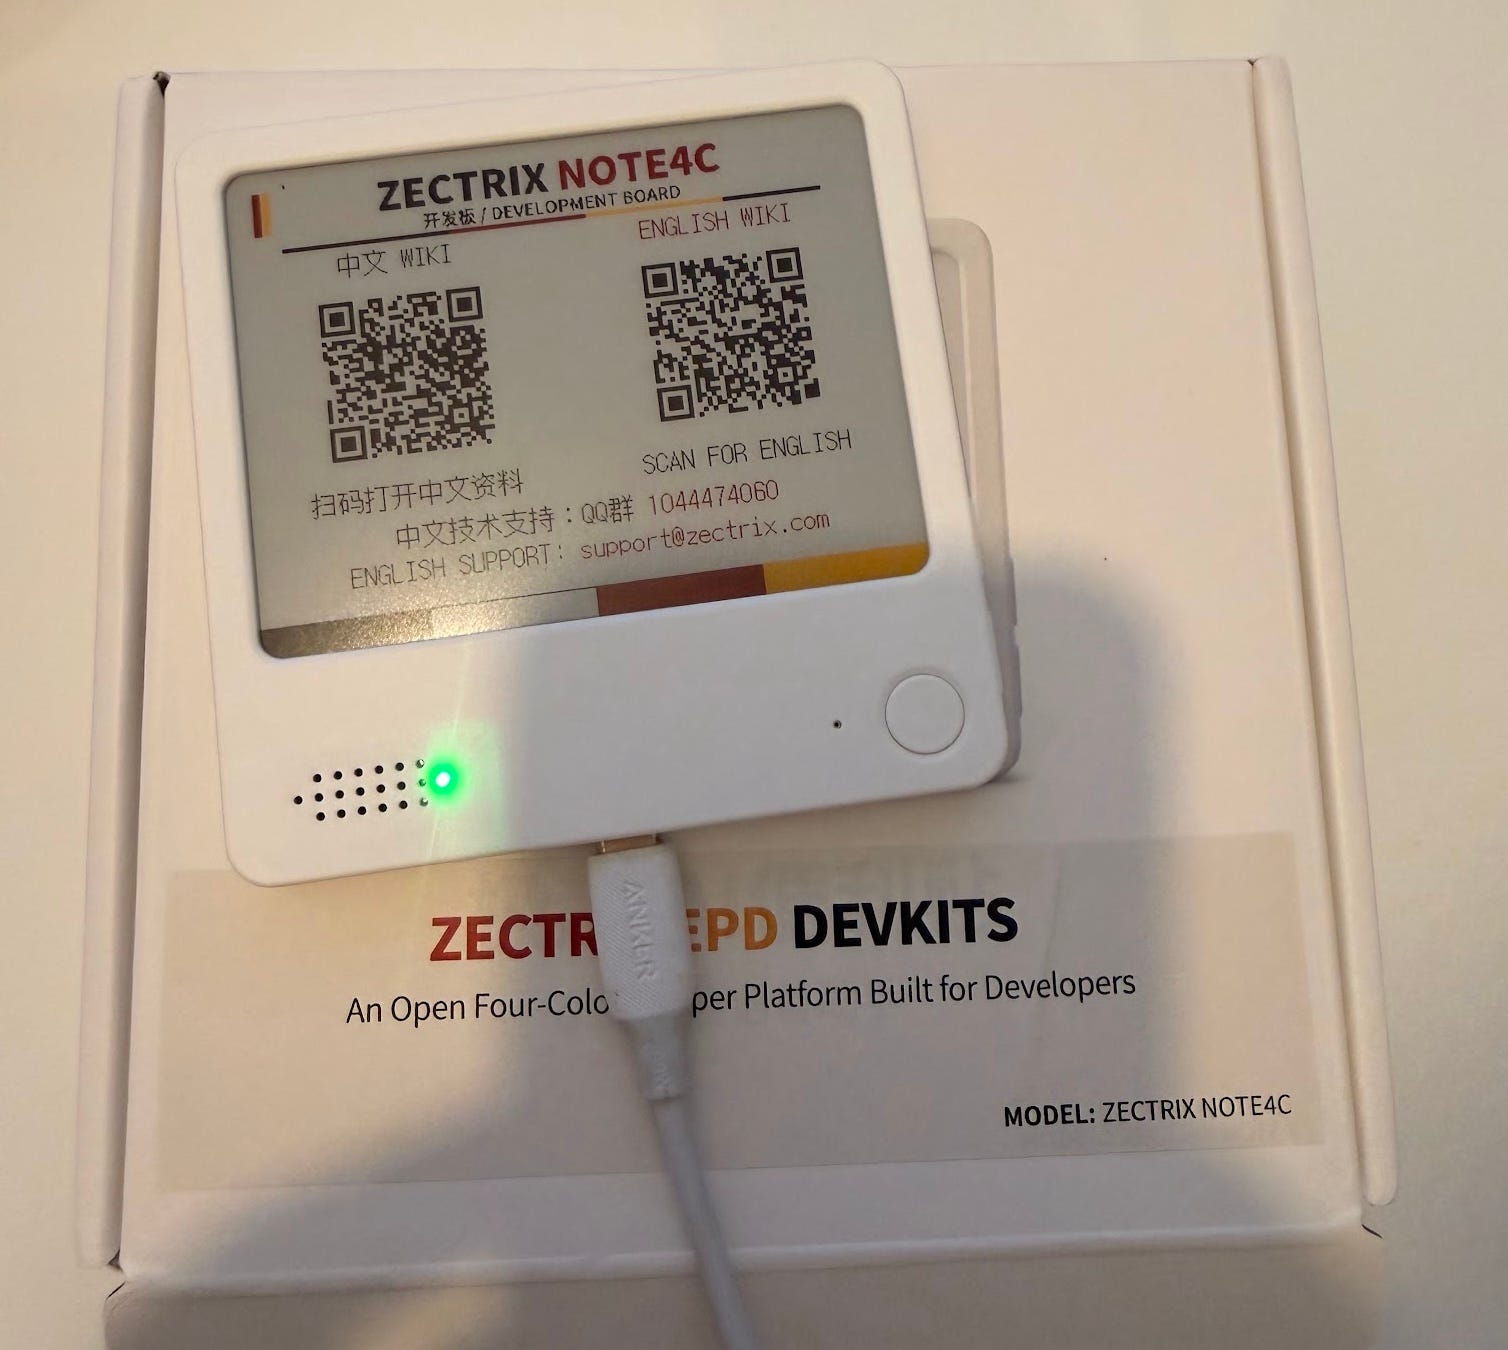
I also gave Codex the link to the Note 4C developer documentation to give it full context over what the device is and how it works. The Note 4C developer docs are actually really good, so it gives Codex all the context it needs to be able to start developing screens
Link to docs: https://wiki.zectrix.com/en/hardware/note4c/quick-start
Once I had the device all hooked up and talking to Codex I started describing the first dashboard I wanted to build with a prompt like this.
I would like to build a live updating dashboard to display on my Note4C device. The dashboard should be hosted on Cloudflare Workers and pull in the latest live train departure data for Brighton Station. It should be a nicely designed train departure board that utilises all the colors of the Note4C device and updates on the Note 4C every 15 minutes. I would like to preview the design of the dashboard here in Codex before we push it to Cloudflare and set up the device.
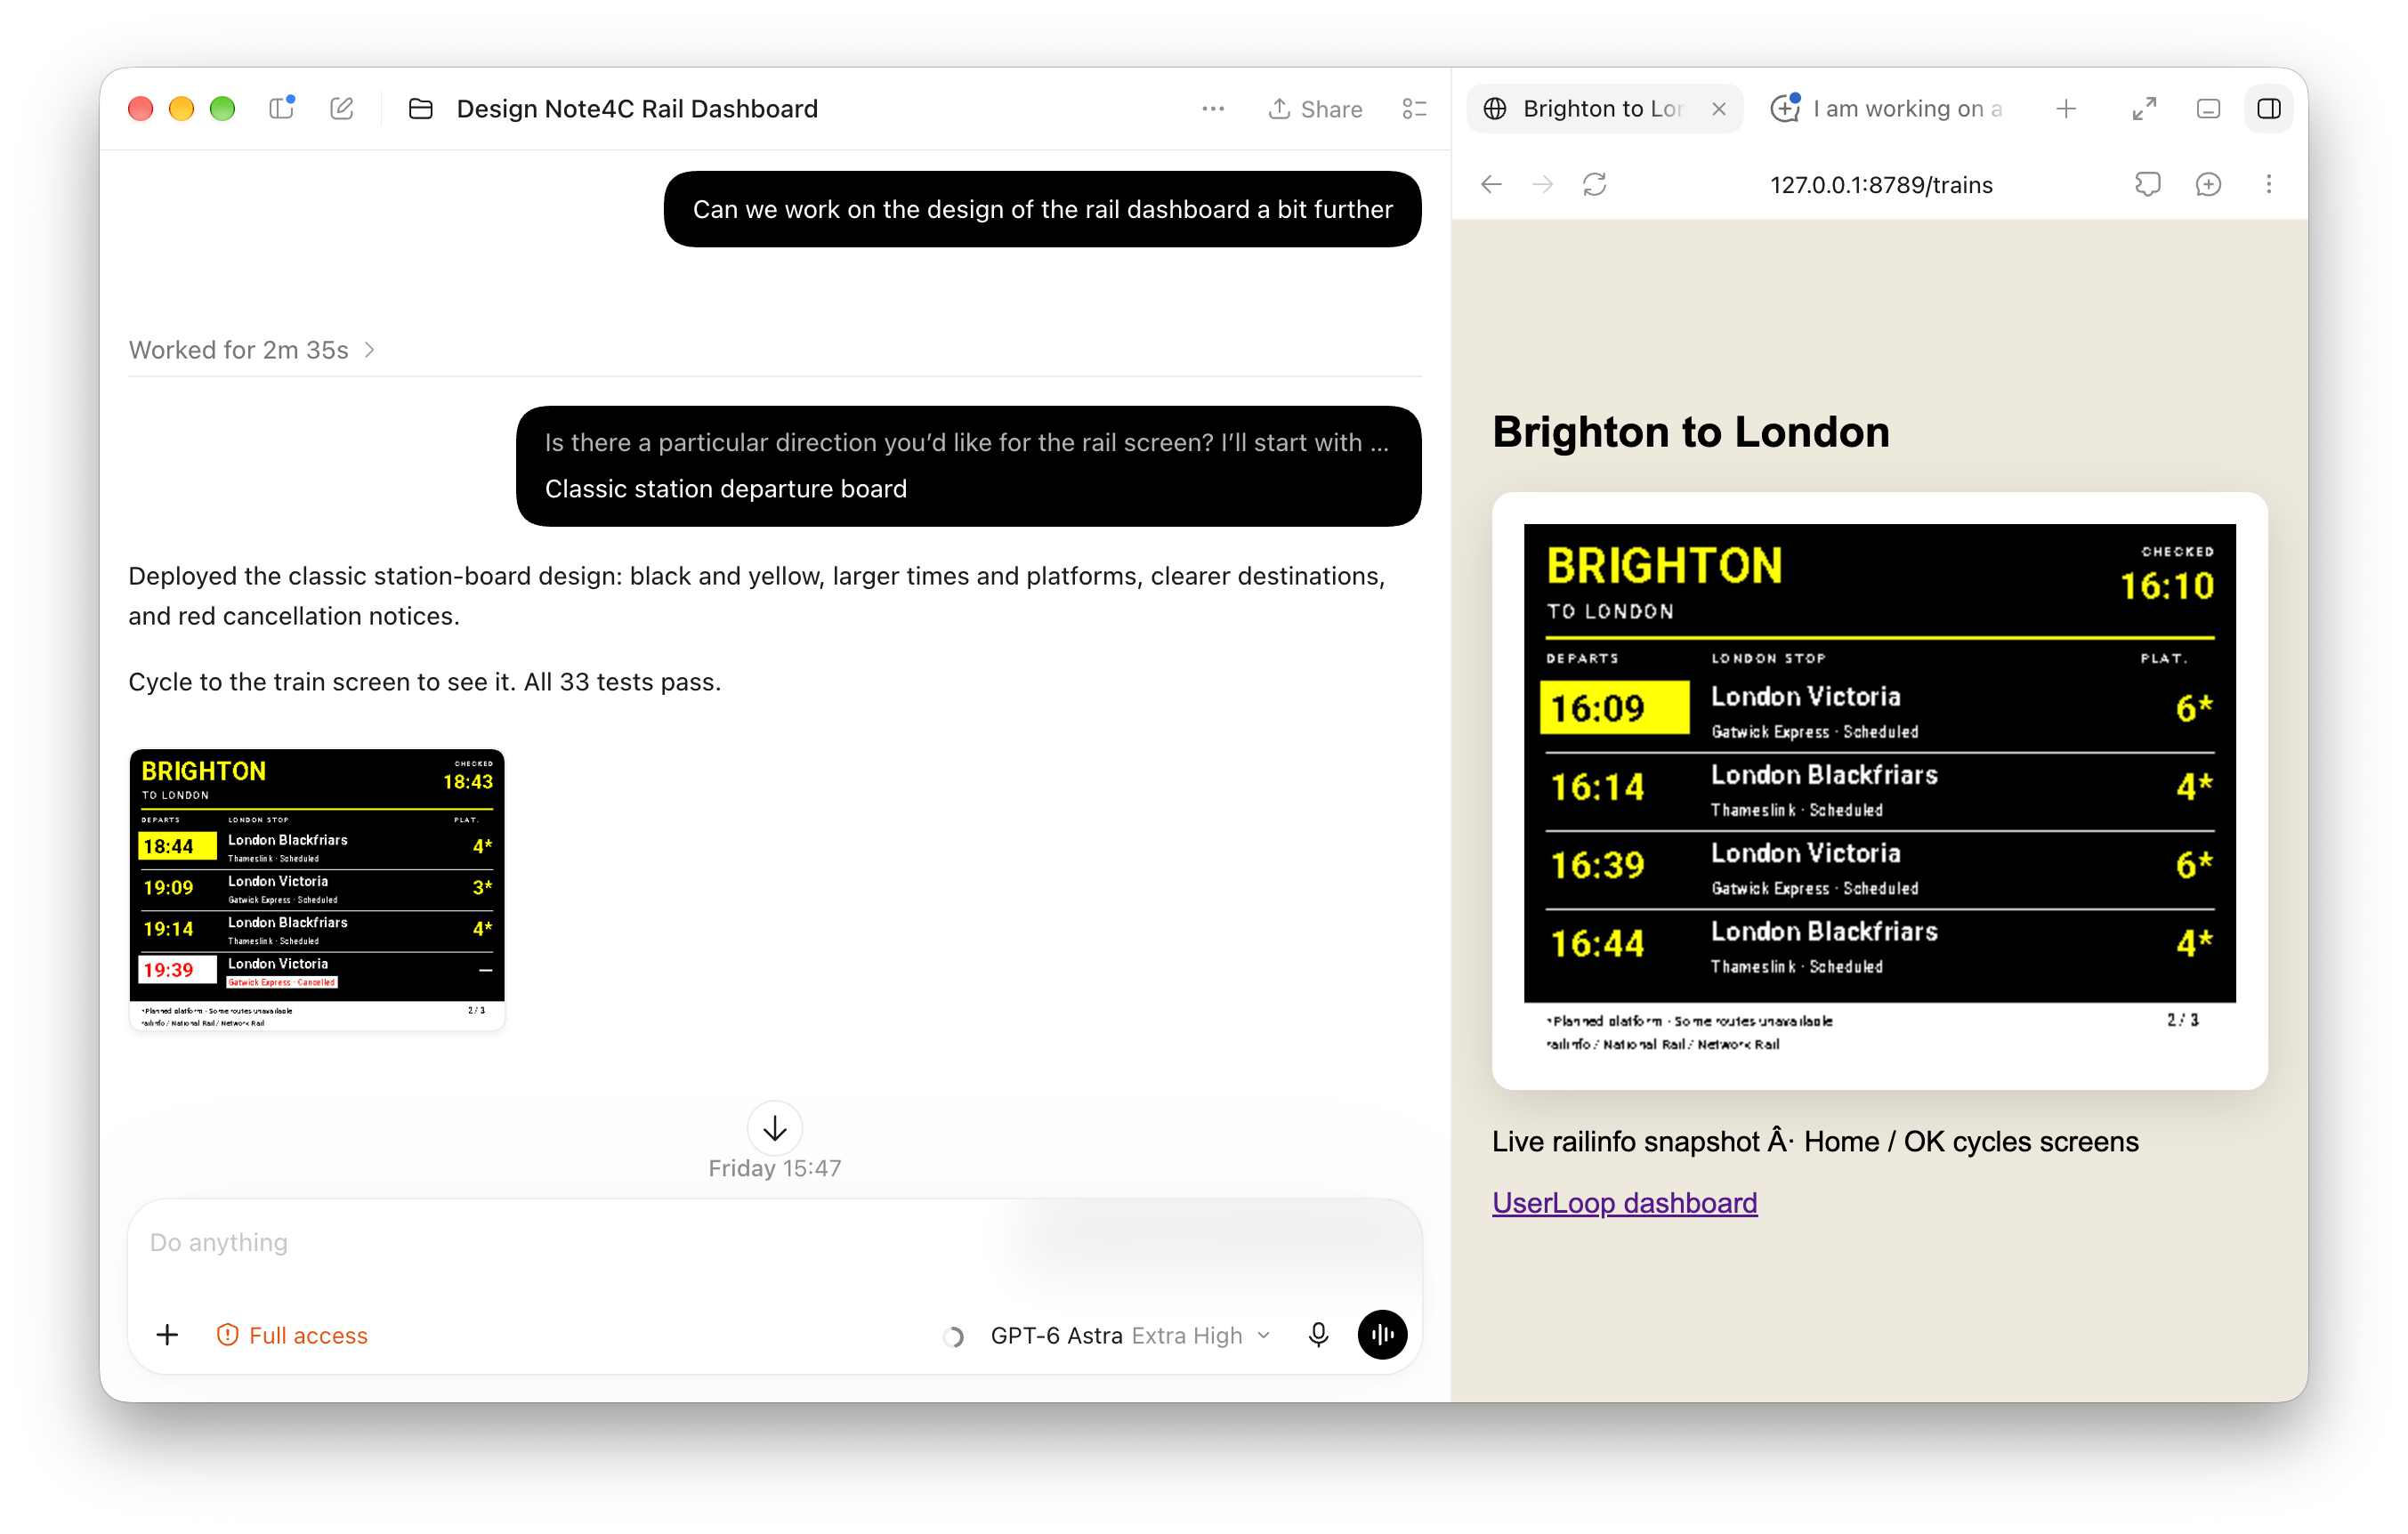
Once you have described the dashboard you want to build, you should then just ask Codex to show you a live preview of the design you’re working on. This means when we push this to the device for the first time it should already look exactly how you want it to.
Codex should then fire up a local dev server rendering the live image that’s going to be served, and let you chat back and forth to update the design to get it exactly as you want. You might need to make a few changes or answer questions from Codex, depending on what API you’re using. If you’re using an API that requires a key, there might be some extra steps, but Codex will be able to talk you through that.
Once you’re happy with the design of the dashboard that you can see in the preview in Codex, the next step is to get it set up on the device itself, and this is the prompt I used to get it working on mine…
OK, now that we have the dashboard all set up, I’d like to publish this to Cloudflare on a new Cloudflare worker, and then have the Zectrix device pull that image from that Cloudflare worker, refreshing every 15 minutes. Please get all this deployed and connected to the device now
After a few minutes you should then see something like this on your device!! Live train data, rendered into an image on the Worker then displayed on your Note4C Screen.


This is obviously just one example of a dashboard that you could build. I then went on to build lots more dashboards, like an MRR tracker for my SaaS business, tracking the number of subscribers to the newsletter and lots of other things.
You can also program the button on the bottom right of the device to rotate between screens, or even automatically rotate between screens on demand. You can customize how often each screen refreshes as well. Some screens may only need refreshing once a day, and some might need to be refreshed every 10 minutes, depending on the use case.
One thing worth noting is that the device itself takes around 10 seconds to fully reload new content due to the e-ink technology, so it’s not ideal for live data that needs to be real-time. It’s better for dashboards that update periodically.
After I shared my build on X I ended up in a DM chat with the founder of the company who built the device Richard!
We recorded an interview all about how Zectrix came about and some of the interesting things people have been building with the device. Richard started out with a previous business building eink shelf edge labels for supermarkets shipping millions of devices.
We also chatted about what other form factors might be coming next! You can watch my interview with Richard below….
After our call Richard was also kind enough to share an exclusive discount for newsletter readers to get a discounted rate on your own Note4C device for experimenting. So you can get your own device now.
Thanks for reading and I hope you found this issue interesting! Please do drop me a reply if you end up building your own hardware project… I always love hearing from you.
Until next time… happy building!