


Hey there!
Welcome to this week’s newsletter, you might notice I’ve spruced up the design a bit… hope you like it.
This week I gave a talk at Brighton AI where I showed some of the many automations we built to run the Create With Conference this year, and one of them in particular seemed to spark a lot of interest - generating videos from inside Claude Code.


In this issue I’m going to show you some examples and everything you need to get set up to start making your own videos.
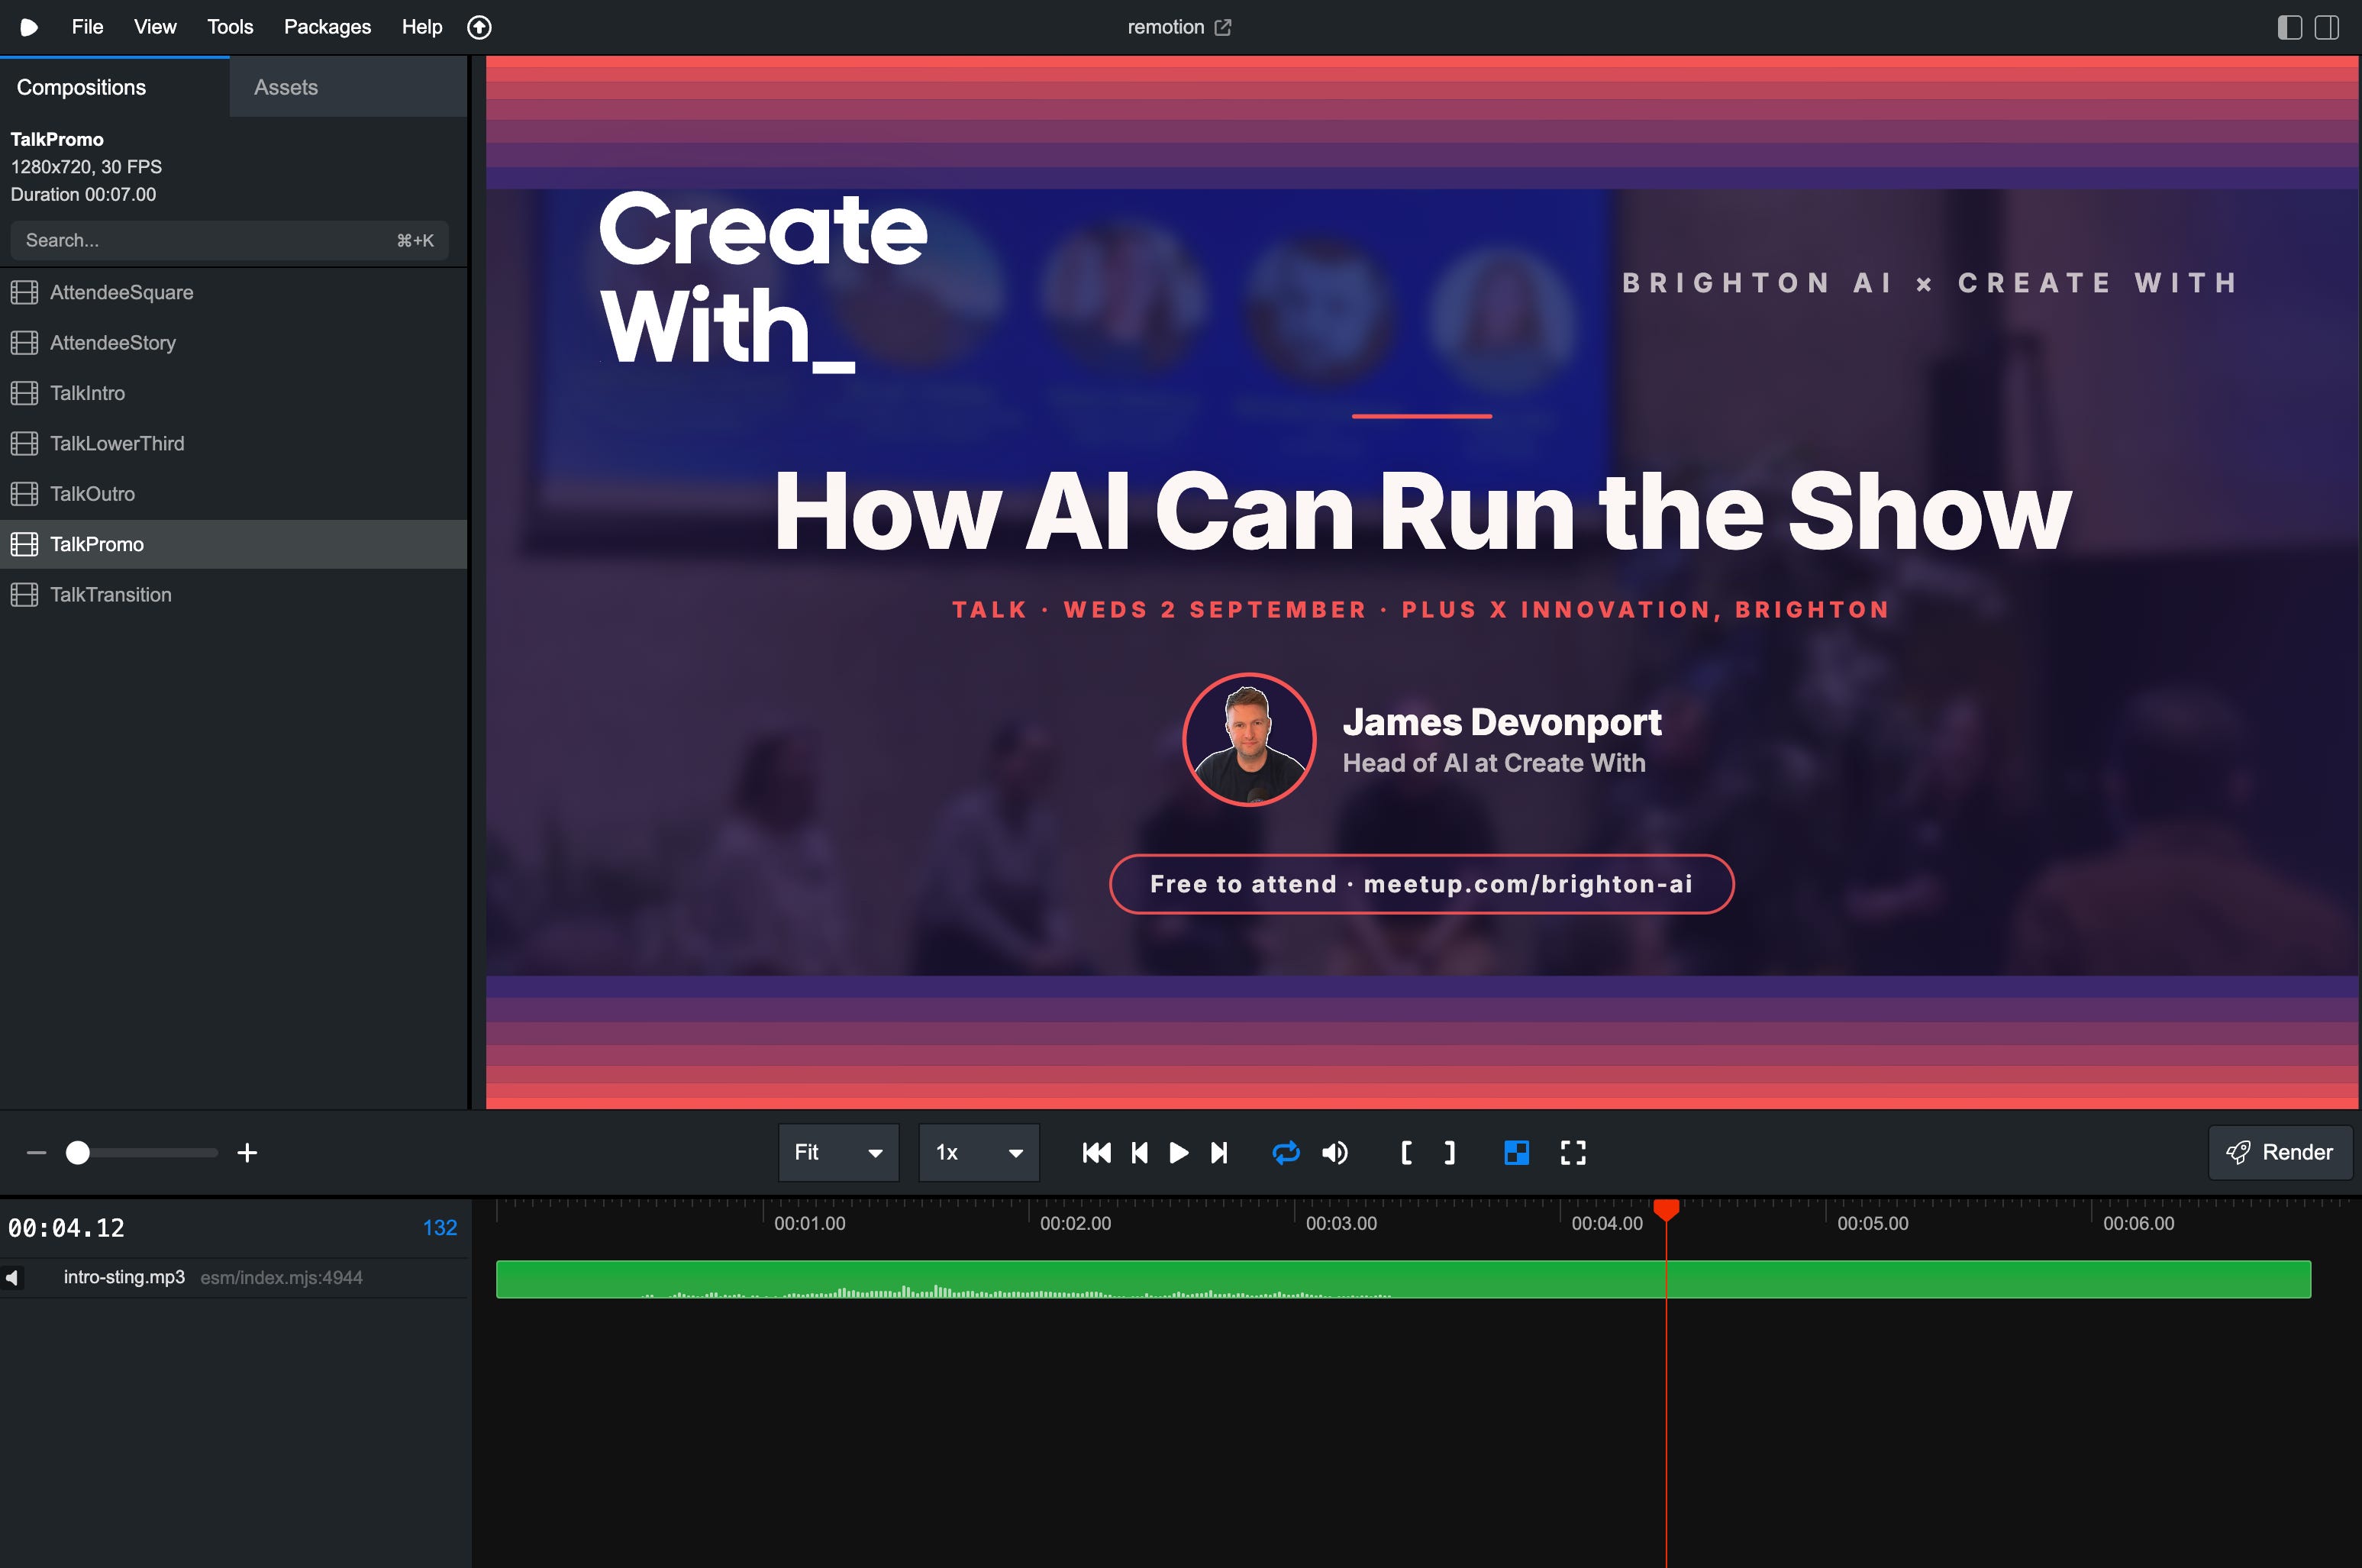
I did a live demo where I dictated in the video I wanted to be generated, snapped a selfie with the audience and dropped it into Claude code… about 20 seconds later I had a fully on brand video ready to share.
These kind of automated videos have saved me a huge amount of time this year, on everything from ads to producing videos for YouTube. There is something quite magical about speaking to Claude and getting consistent videos out the other end - it makes you feel like a movie director 📢😎
I should make it clear these are not the same kind of AI generated videos you typically see on social media which have been made by models like Google Veo or Grok Imagine, this is about making repeatable and consistent videos which follow a set template. They are basically rendering React web components behind the scenes, which means they can use repeatable templates.
It’s great for making things like ads, social media videos, title cards etc… anything which requires a nice little video to share.
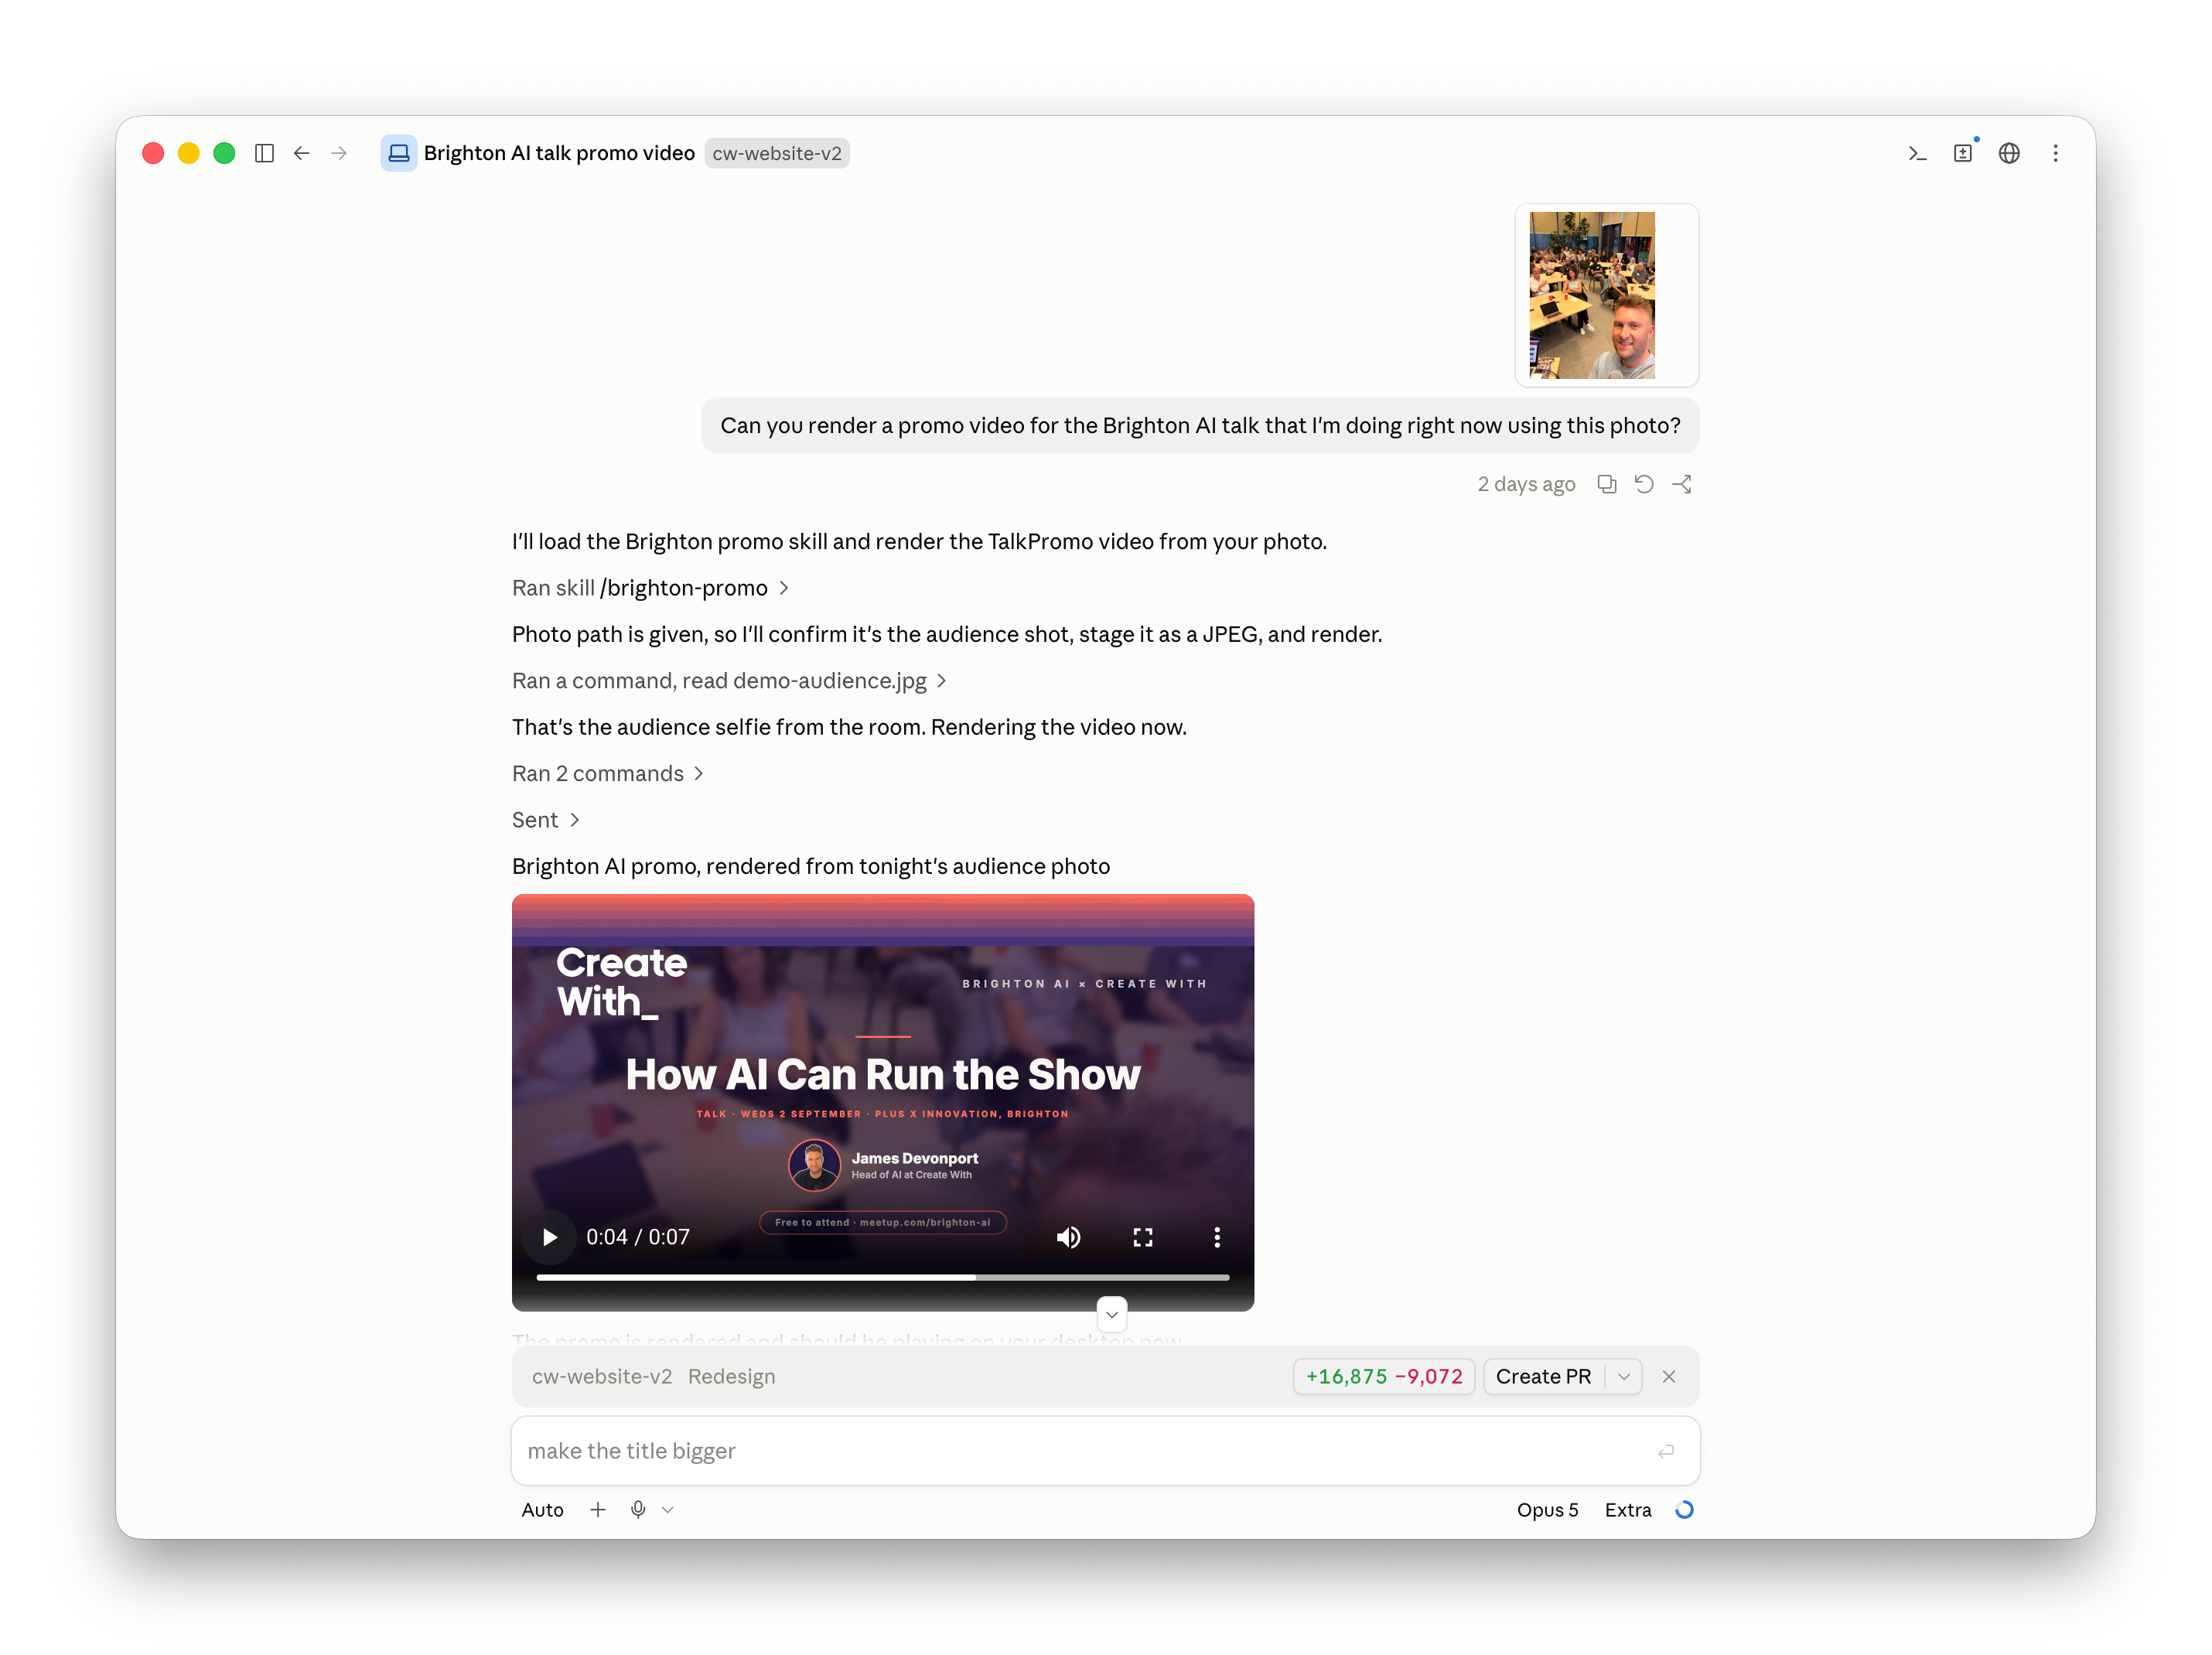
Here’s the example video I generated during my talk. It pulled in my photo, branding and used the selfie I took as the background for the image, it even used the background music I had set.
This was all done with the prompt in Claude Code…
Can you render a promo video for the Brighton AI talk that I'm doing right now using this photo?
So how is that possible? How do you generate branded videos reliably… for free?
It’s all thanks to an open source library called Remotion, it’s a way programatically generate motion graphics and videos - and it can all be controlled by Claude Code.
Getting ready to render your first video with Remotion
Now let’s go through everything you need to get set up and running.
Before we get to installing Remotion I want to talk a bit about the basics of getting an AI friendly brand folder ready to go, this will mean when you come to make your videos you have everything you need.
Here’s a slide from my talk at Brighton AI where I shared the Create With brand folder and how it’s structured. (the whole talk is on YouTube here if you’re interested)
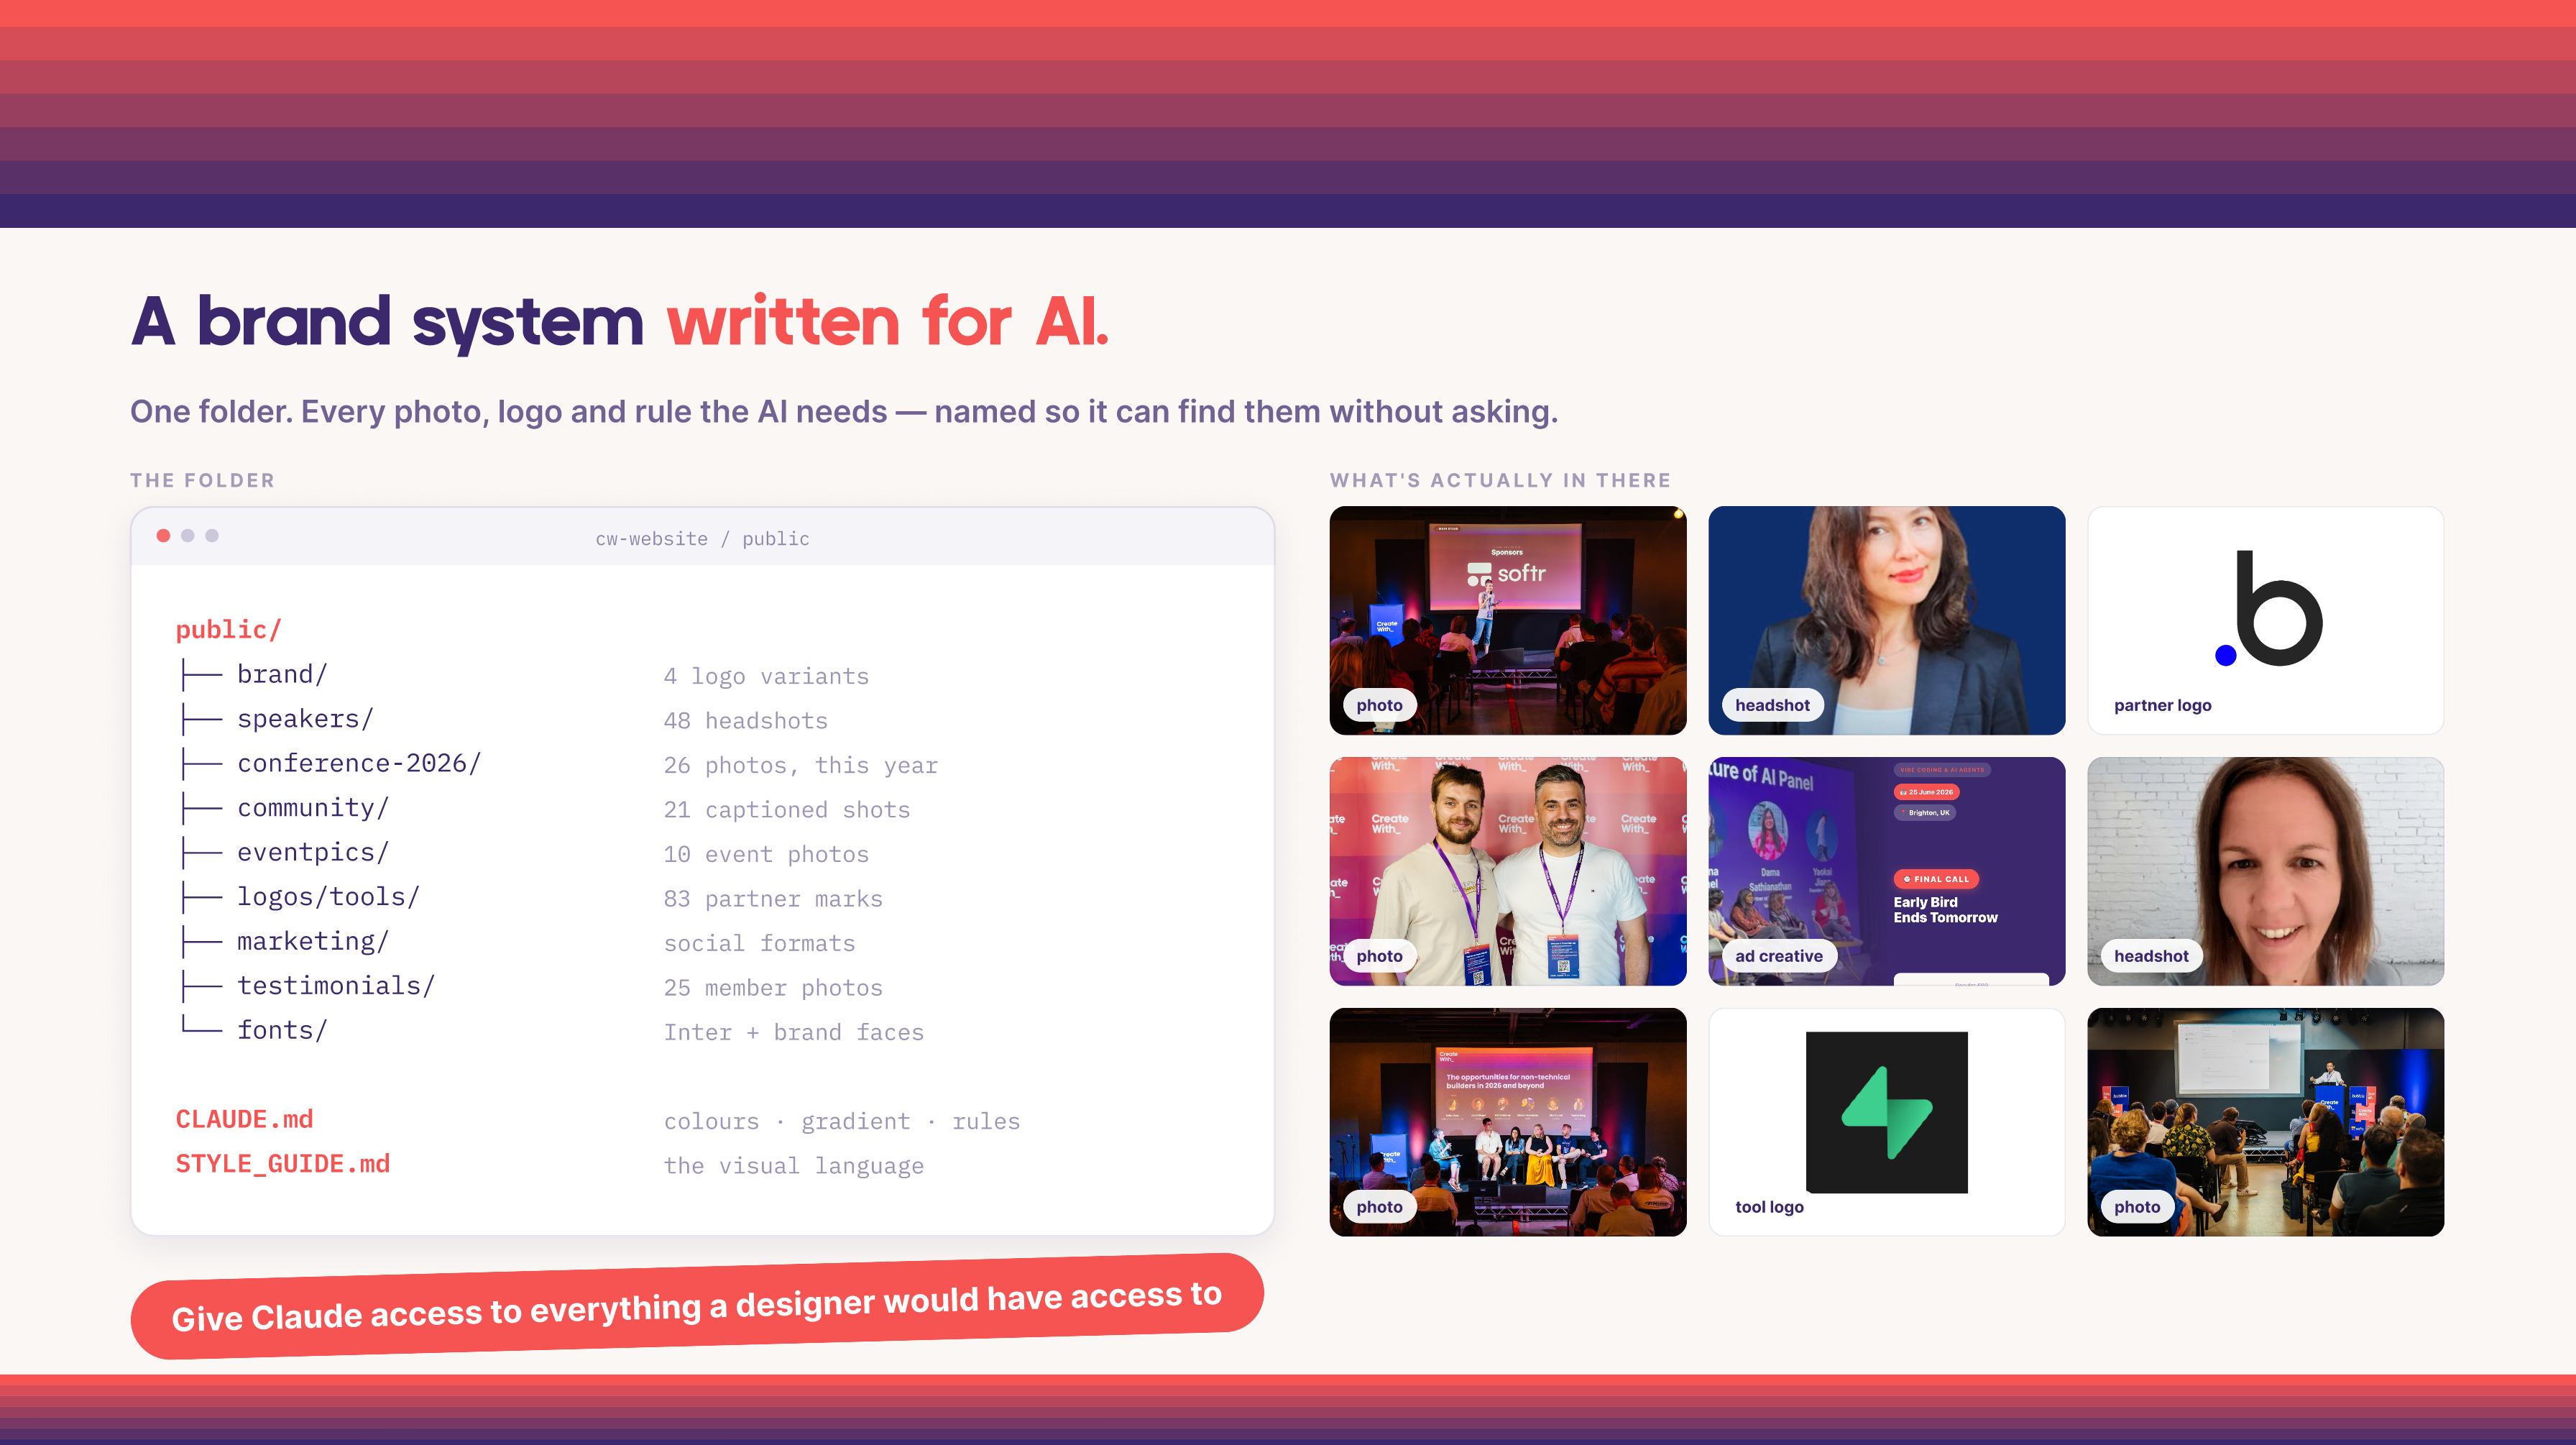
Essentially it’s a folder containing everything a human designer would need if you asked them to design a website for you. Logos, photos, fonts, music… basically everything you have. The more the better!
The great thing is, if you don’t already have a brand folder you can just chat with Claude and ask it to help you get one structured. Get together as many assets as you can and hand them over to Claude to structure them.
The reason this is so important is it gives AI context of your brand ready for when you want to start generating videos. With access to this folder, it will already have access to things like your logos, colour scheme, photography, fonts etc.
So when you generate your first video it will probably look pretty good on just the first draft - I really recommend taking the time to get this in place before you start with the videos.
The bonus is that having a folder like this also helps you generate all sorts of other things like web pages, HTML email templates etc.
Installing Remotion to Claude Code or Codex
The next step is to actually install the Remotion plugin to Claude Code - this all also works with Codex so these instructions apply to both.
There are 2 ways to install it, you can either follow the instructions on the Remotion website here and run a few commands to get it installed
OR… you can just give this URL to Claude and ask it to to install it for you, it will grab the plugin and get it all set up and ready to go for you.
Once that’s done, you should be ready to get started. There isn’t much UI you need to worry about with Remotion, we’re going to be doing everything from Claude Code, but it does have a studio UI which you can use to preview and fine tune your videos, we’ll take a closer look at that shortly.
Rendering your first video
Once you have your brand folder and Remotion installed you’re ready to start rendering videos! I recommend starting with a single fairly simple template, for example maybe try generating a 10 second social media video to promote a blog post.
I would recommend with starting with a prompt like…
Generate a video using Remotion to promote the below blog post, it should be optimised for Instagram in a 1:1 format, use the brand assets in my folder to make the video keeping it on brand. Add interesting and exciting animation elements to the video to catch the viewer’s attention. When you’re ready open the Remotion studio in the Claude browser and show me the rendered video.
This should then come back to you in a few minutes with something that looks a bit like the window below. This is the Claude Code desktop app with the Remotion Studio open inside a browser preview tab.
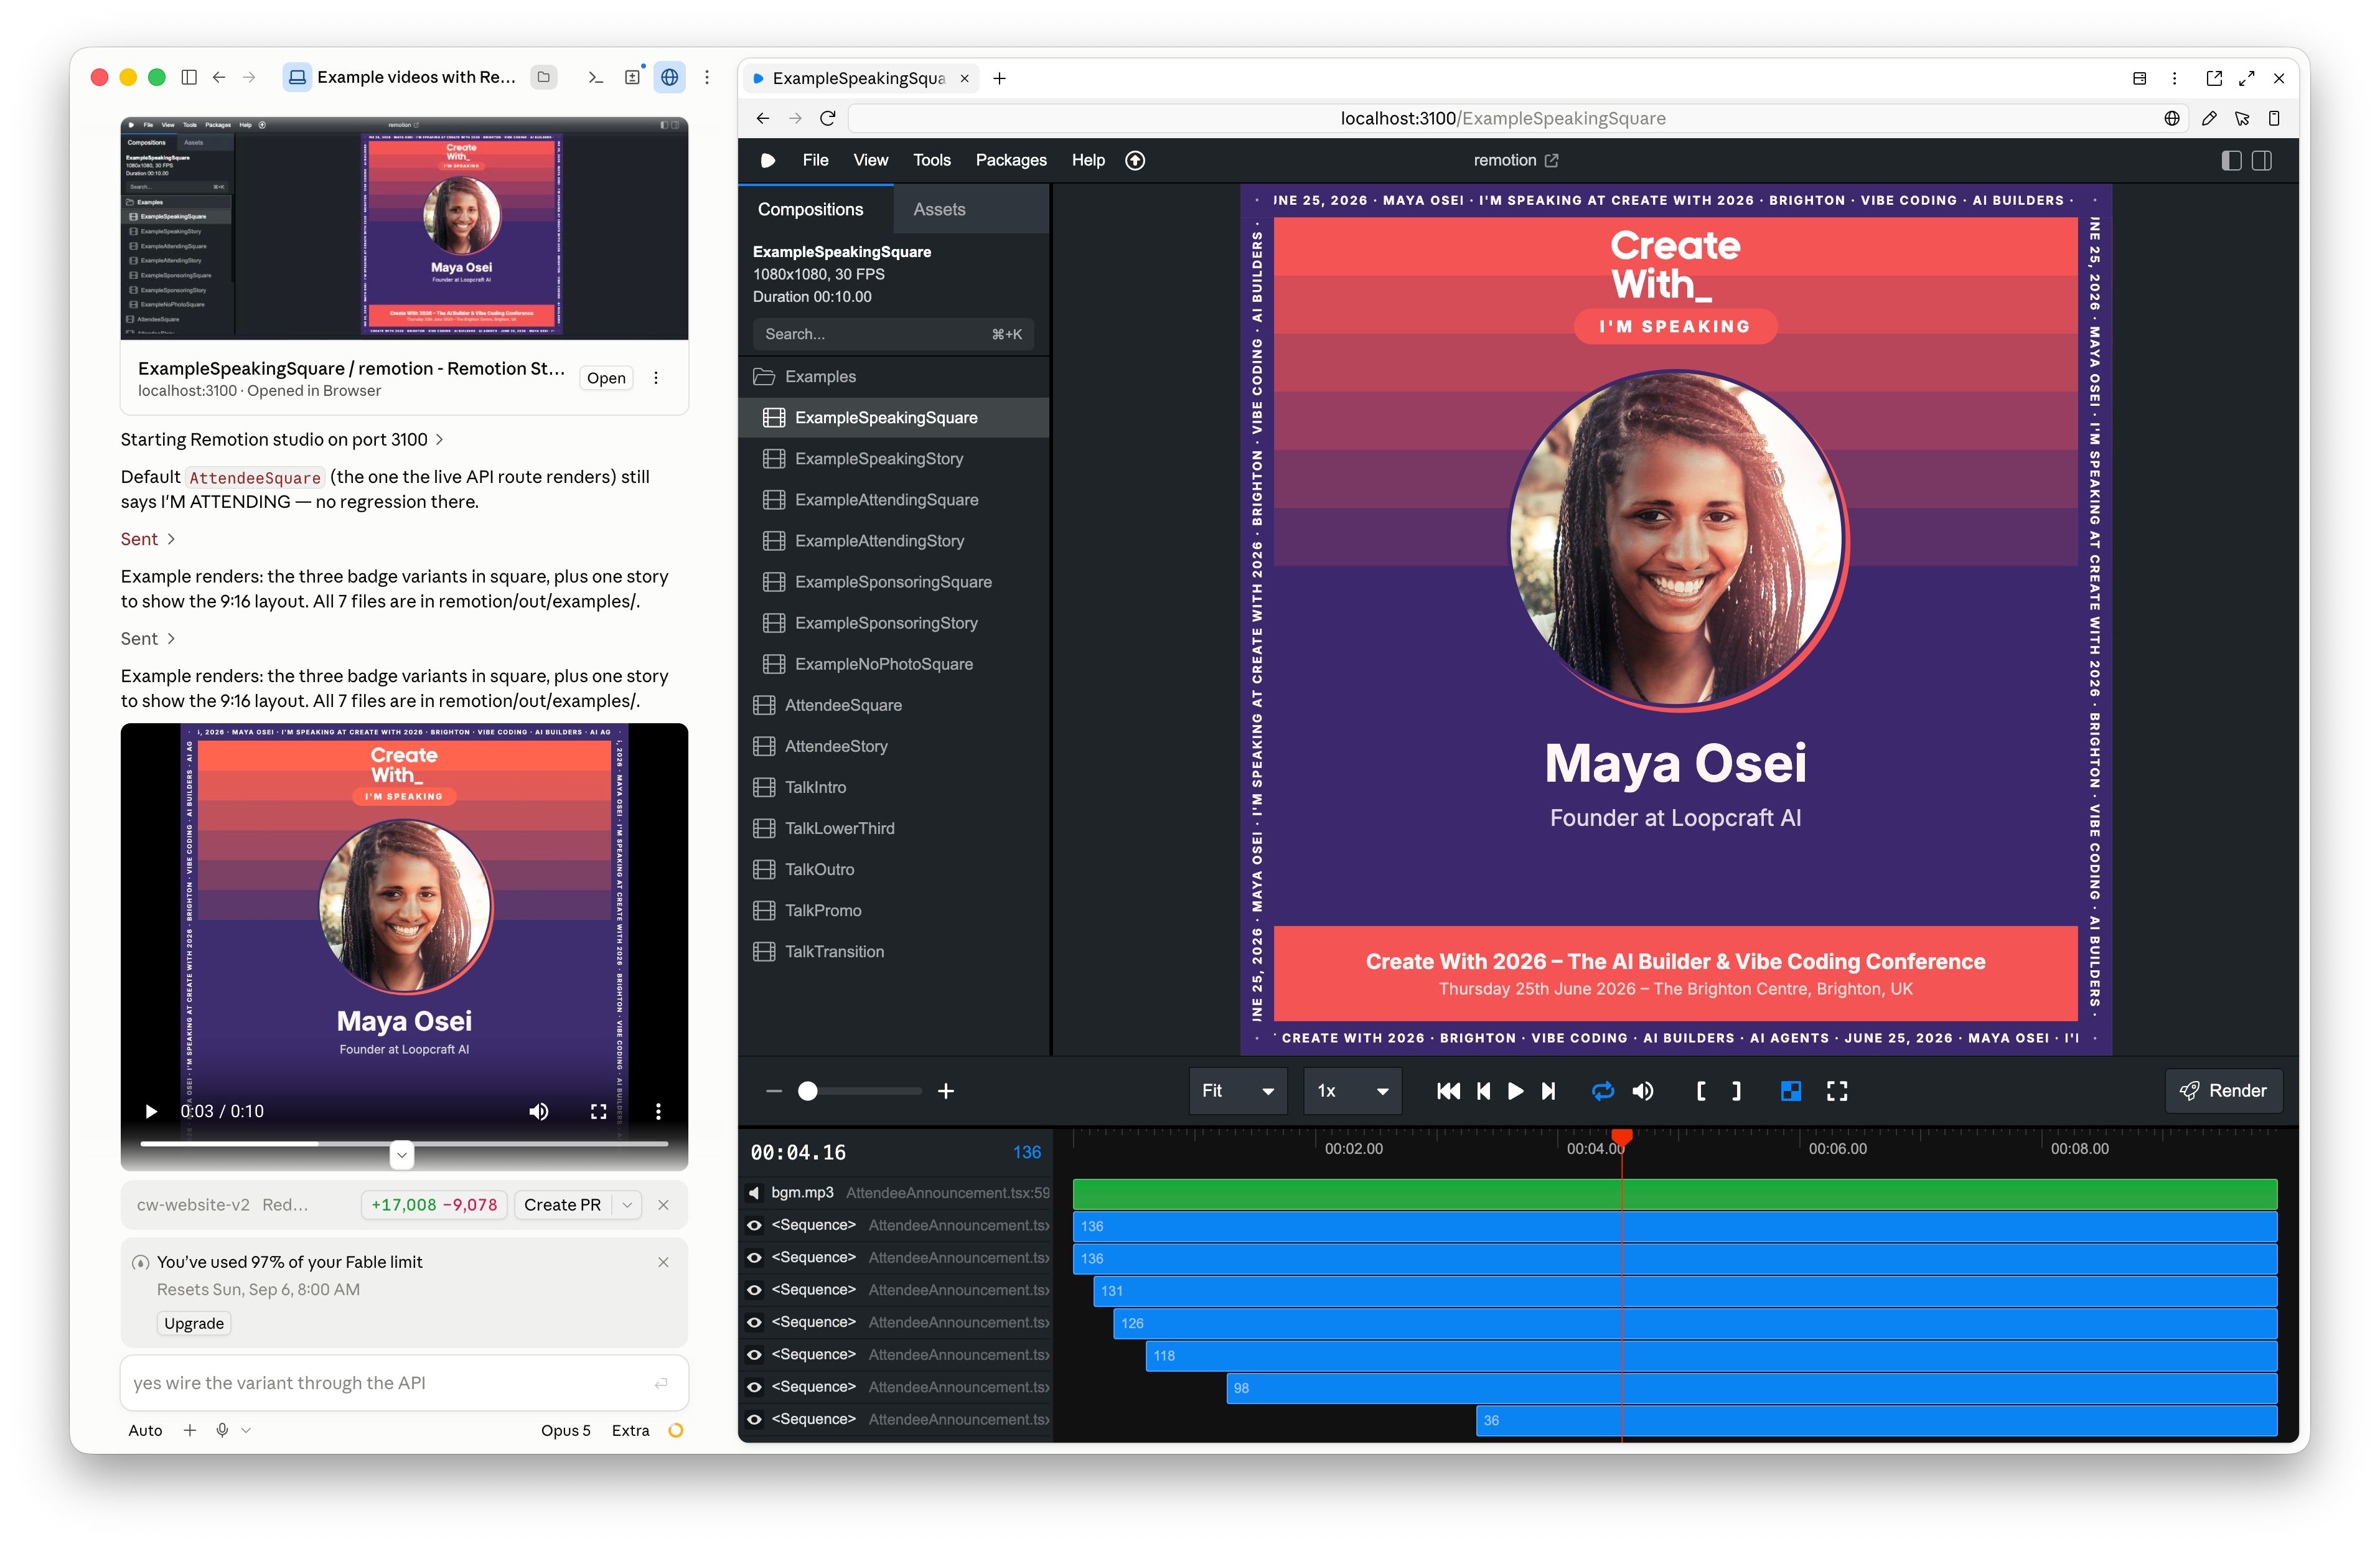
This lets you see all the different elements of your video, how all the animations work and all the assets… making it easy to give feedback.
The really nice thing about this is as you chat back to Claude in the chat, you’ll see your video preview start to update in real time with your changes.
If you use a voice transcriber to dictate your feedback this really makes you feel like a director and is insanely cool to watch… I ended up making lots of videos as it was so fun!
You should now be able to go back and forth and get a good first version of your video.
The next step is where things get very cool, once you have a nice template in place you can start generating tons of videos in batches, for example pulling in data from a spreadsheet or database to create tons of customised videos.
Generating batches of videos
This is where Remotion became indispensable for me this year when running the conference. It allowed me to generate hundreds of videos on demand simply by chatting.
Because it’s all done in Claude Code I was able to ask things like…
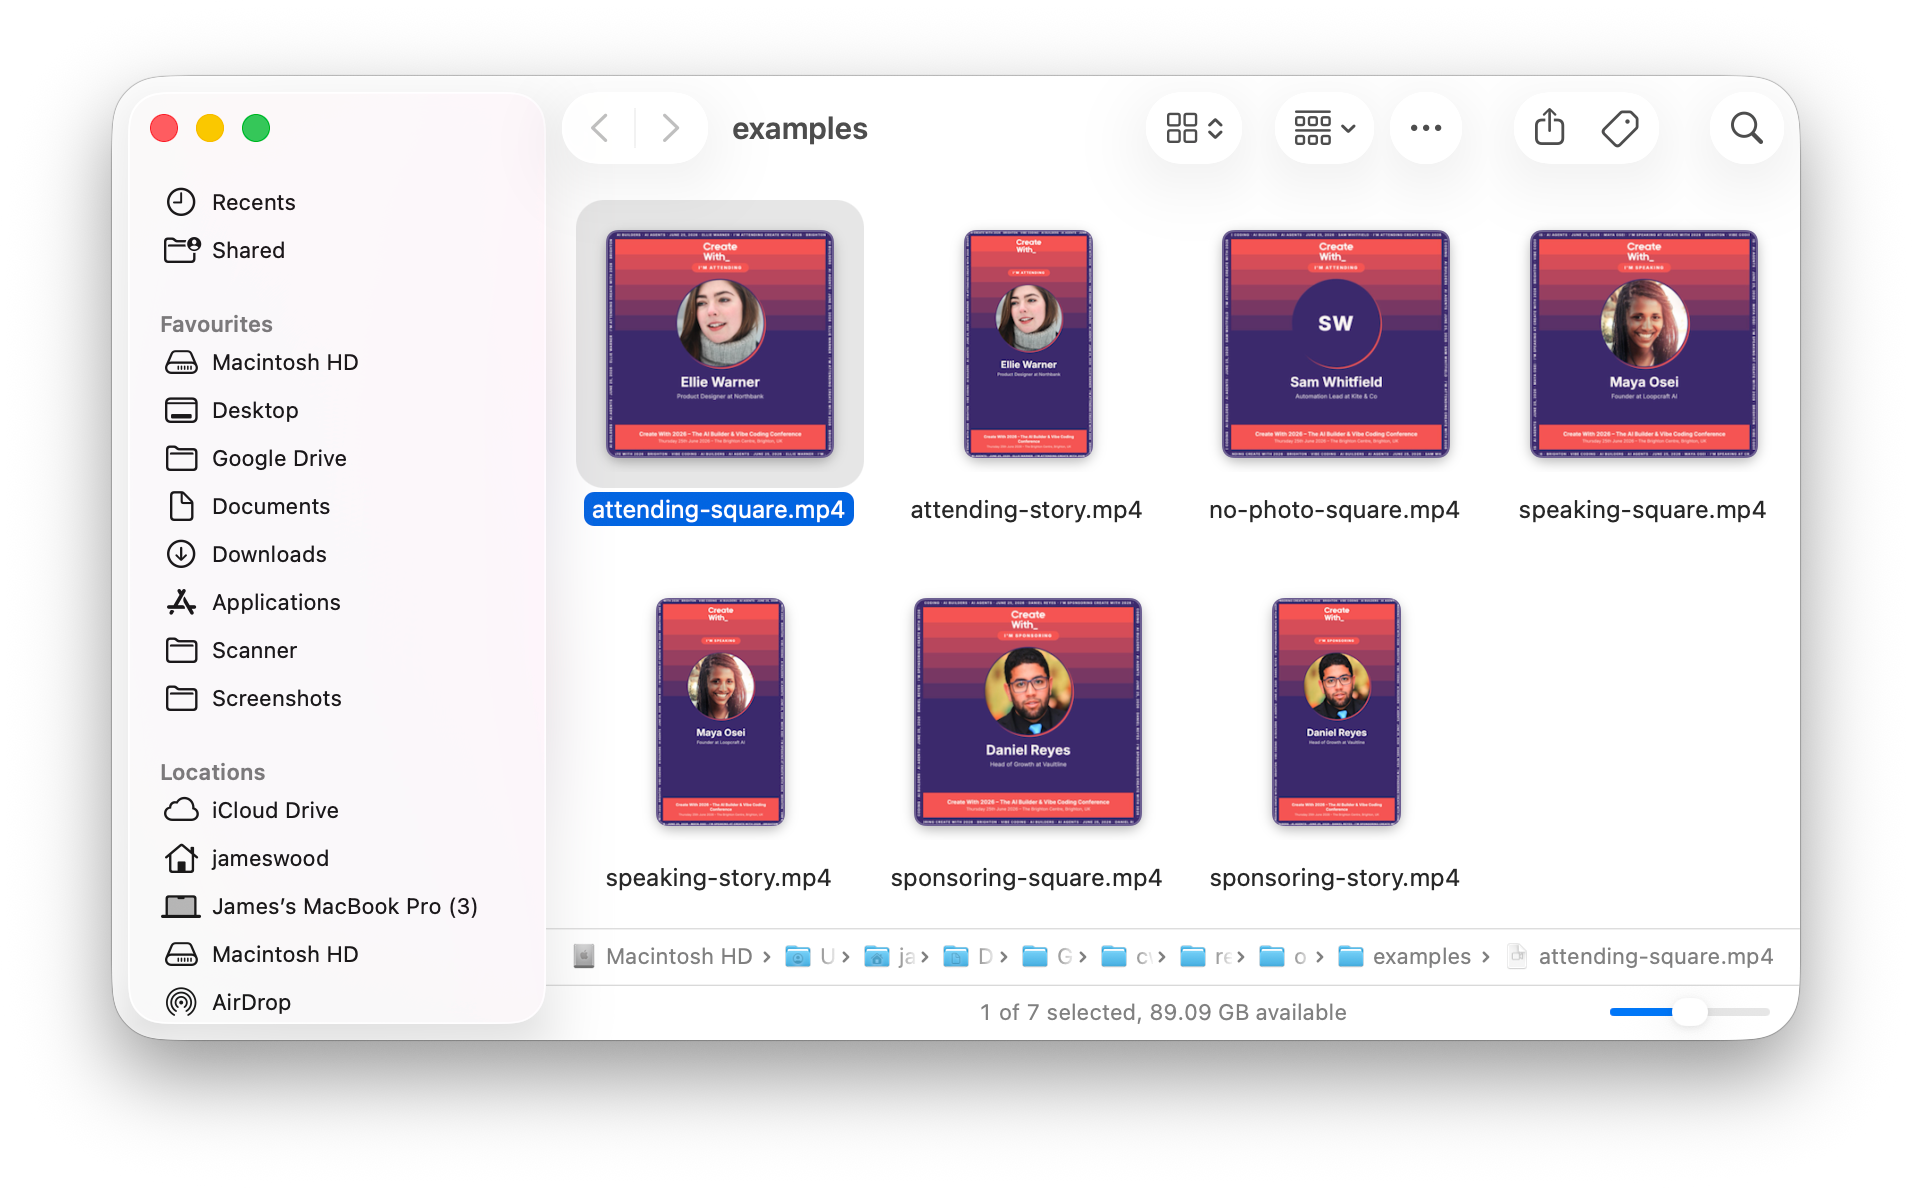
Generate a speaker announcement video for everyone speaking at the conference this year, pull in speaker data and photos from Supabase to generate the videos and store all the rendered videos in a folder.
This also allowed me to generate multiple formats at once like portrait / squares for different platforms all in one swoop. Once the job is done it will pop them open into a folder for you with them all rendered and ready to go.
That’s it for this week.
I hope you enjoyed this issue and found it useful. I really recommend giving Remotion a go, it’s a fun weekend project.
I’m going to be covering some other tricks similar to this in future, including how to design apps and marketing materials by connecting Claude Code to Figma so stay tuned for that.
Any thoughts or suggestions? Drop me a reply, I love hearing from you!
Happy building!
James.